Lap marks are those ugly stripes caused by uneven layers of paint buildup. They occur when you interior painting san diego roll over paint that’s already partly dry. (In warm, dry conditions, latex paint can begin to stiffen in less than a minute!) With these tips learn how to paint interior walls. While you’re at it, check out these trim painting tips!
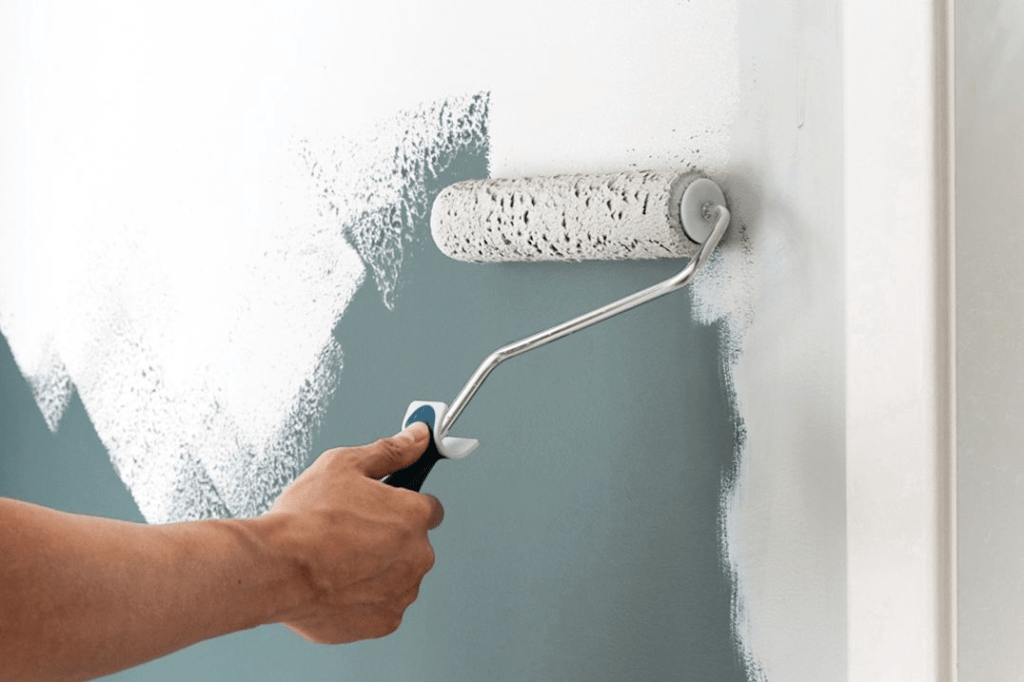
The key to avoiding lap marks when learning how to paint interior walls is to maintain a “wet edge,” so each stroke of your roller overlaps the previous stroke before the paint can begin to dry. Here are some painting tips:
To maintain a wet edge, start near a corner and run the roller up and down the full height of the wall, moving over slightly with each stroke.
Move backward where necessary to even out thick spots or runs.
Don’t let the roller become nearly dry; reload it often so that it’s always at least half loaded.
Keep the open side of the roller frame facing the area that’s already painted. That puts less pressure on the open side of the roller, so you’re less likely to leave paint ridges in your stylish wall painting ideas.
Mix Several Cans of Paint in a Large Bucket
Paint color may vary slightly from one can to the next. If you have to open a new can in the middle of a wall, the difference may be noticeable. Mixing the paints together eliminates the problem. It’s best to estimate the amount of paint you’ll need and mix it in a 5-gallon bucket (a process called “boxing”).
Here are some good painting tips:
When coverage is difficult to estimate, add more rather than less when learning how to paint interior walls. You can always pour the leftover back into cans.
For large jobs, use the bucket and a roller screen rather than a roller tray. It’s much faster to load your roller with the screen than to use a roller pan.
Simply dunk the roller into the paint bucket, then roll it along with the screen until it stops dripping.
Let the Paint Dry, Then Cut the Tape Loose
Once the paint is dry, you can’t just pull the tape off the trim. Paint forms a film between the wall and the tape and removing the tape tears pieces of dried paint off the wall. So before pulling off the tape, cut it loose.
Wait for the paint to completely dry, at least 24 hours, then use a sharp utility knife or box cutter knife to slice through the film. Start in an inconspicuous area to make sure the paint is hard enough to slice cleanly.
If you cut the paint while it’s still gummy, you’ll make a mess. As you cut the paint, pull up the tape at a 45-degree angle.
Paint the Trim First, Then the Ceiling and Walls
Pros usually follow a certain order when learning how to paint interior walls. They paint the trim first, then the ceiling, then the walls. That’s because it’s easier (and faster) to tape off the trim than to tape off the walls. And you certainly don’t want to tape them both off.
When painting the trim, you don’t have to be neat. Just concentrate on getting a smooth finish on the wood. Don’t worry if the trim paint gets onto the walls. You’ll cover it later when painting the walls.
Once the trim is completely painted and dry (at least 24 hours), tape it off (using an “easy release” painter’s tape), then paint the ceiling, then the walls.

Leave a comment